Wednesday, November 25, 2009

How to make a cute Countdown Calendar


Once a month my sisters and I try to get together and make some sort of craft or do something fun! This month we made advent calendars for Christmas! These turned out way cute and I hope you enjoy them.
First what you need:
2 4x4 blocks cut to be squared
1 2x4 cut 8 inches long block

paint
sandpaper (if you have an electric sander that is super handy)
2 sponge paint brushes
mod podge
12 scrapbook paper squares 3inches x 3 inches (you can have as much variety in this as you choose)
Coordinating paper or vinyl with the words you want on the block and the following numbers: 001122345678

Step 1: Sand down your blocks to get rid of all rough edges. I highly recommend wearing safety goggles while doing this step.

Step 2: Get your paint and your blocks out. Paint 1 to 2 coats of paint on your blocks. This all depends on how dark you want your color and how much of the wood you want to show. ALLOW PAINT TO DRY BETWEEN COATS

Step 3: While the paint is drying cut out your paper.
12- 3"x3" squares
2- 1"x 7 3/4" rectangles
2- 1"x 3" rectangles
Step 4: you can either purchase vinyl numbers and letters that are pre-cut. The numbers should be no larger than 3 inches we used 1 1/2 inch tall numbers. The letters should be no larger than 1 inch, we used 3/4inches. We used a cricut to cut out our numbers and letters. You could also do this on your computer or as a freehand.

Step 5: Modpodge your squares onto the blocks. You can either paint the modpodge onto the block or the paper. Then let the modpodge dry.

Tuesday, November 24, 2009

How to make a cute Countdown Calendar


Once a month my sisters and I try to get together and make some sort of craft or do something fun! This month we made advent calendars for Christmas! These turned out way cute and I hope you enjoy them.
First what you need:
2 4x4 blocks cut to be squared
1 2x4 cut 8 inches long block

paint
sandpaper (if you have an electric sander that is super handy)
2 sponge paint brushes
mod podge
12 scrapbook paper squares 3inches x 3 inches (you can have as much variety in this as you choose)
Also coordinating paper to go around bottom rectangle
Coordinating paper or vinyl with the words you want on the block and the following numbers: 001122345678
brown ink pad or coordinating color if you want to distress your blocks

Step 1: Sand down your blocks to get rid of all rough edges. I highly recommend wearing safety goggles while doing this step.

Step 2: Get your paint and your blocks out. Paint 1 to 2 coats of paint on your blocks. This all depends on how dark you want your color and how much of the wood you want to show. ALLOW PAINT TO DRY BETWEEN COATS

Step 3: While the paint is drying cut out your paper.
12- 3"x3" squares
2- 1"x 7 3/4" rectangles
2- 1"x 3" rectangles
Step 4: you can either purchase vinyl numbers and letters that are pre-cut. The numbers should be no larger than 3 inches we used 1 1/2 inch tall numbers. The letters should be no larger than 1 inch, we used 3/4inches. We used a cricut to cut out our numbers and letters. You could also do this on your computer or as a freehand.

Step 5: Modpodge your squares onto the blocks. You can either paint the modpodge onto the block or the paper. Then let the modpodge dry.
Step 6: After all of your paper squares are dry you can take an ink pad and gently brush it along the edges of the block to create a distressed look.

Step 7: Mod podge your numbers and letters onto the blocks. On one block put the following numbers: 012345
On the second block: 012678
Notes: the 6 doubles as your 9 so be careful to choose a paper that will look good right side up and up side down ie. stripes, solid, etc.
Place modpodge on the back of the number and then all over the face of the block. By putting modpodge all over the face of the block it creates a seal.

After this let it dry and you are done!
Let me know if you have questions.


Something New

We are going to be adding a new section to our blog. We will be adding a how to. I know how much I enjoy learning how to make something for free! So as often as we can we will add a how to on a recipe, a craft or anything we think is fun to do!

Monday, November 16, 2009

Reversible Slings


I decided to try this for a friend of mine who is purchasing 2 for her sisters-in-law. I think they turned out super cute! They can be yours for just $40. They are washable in cold water, tumble dry low. It is like having 2 slings in one!

Friday, November 13, 2009

Card Table Playhouse

This is the ultimate Christmas and or birthday gift for any kid, or the grandparents who have everything! This is a very interactive toy allowing for hours of creative play both inside and out. We have over 20 removable pieces.
Cost:
$135 plus shipping


We will do our best to work with you on personalizing the house too with colors or names.
Also we have put one other design together that you can check out on our sisters blog page at http://staceysquires.blogspot.com/2010/02/ahhhh.html
you will have to scroll down a little. This one is a pet store design.

Thursday, November 12, 2009

Quiet Book

Our quiet books are build your own. The benefit to this is you purchase only the pages you want! The other huge benefit is even if you have 2, 3, 4 + kids you still only need one quiet book! Each child gets to take turns with a set and then trade. If there is a favorite simply buy 2 of them! To purchase pages must be ordered in sets of 2. All colors may vary depending on availability.
Cost:
1 set = $15.00
2 sets = $28.00
3 sets = $39.00
4 sets = $48
5 sets = $55.00 plus the bag free
Bag= $10.00

"Gone Fishing"


"Counting"
Help children learn to count and recognize numbers 1-20

"Buttons"
Use these cute flowers to help your children learn how to button
(flower and button colors may vary)


"You've got mail"


"Peek a boo"
Children can play with the mirror and put their hands in the gloves


"Shapes"

"Noah's Ark"
(finger puppets may vary)
"Build a Snowman"
"Tic Tac Toe"

Quietbooks are great for church, car trips, or anytime children need to be kept busy and quit. They are also great educational tools!

Time for Christmas

Wanda and I have been working hard along with our mom, Nyla, to get some cute ideas for Christmas. First we have a quiet/learning book that will keep your children busy for hours. The second is this amazing cardtable playhouse. We will only be able to do a limited number before Christmas so get your orders in quick!

Monday, July 27, 2009

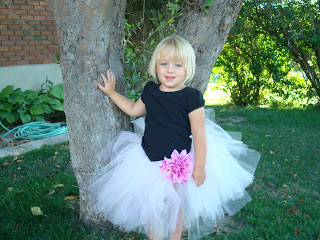
The Cutest Tutu

Our tutu's are made with yards of tulle and are perfect for any of the little girls in your life. We currently offer 2 sizes 0-6 months and 9 months-5t. We also will take custom requests for color, length and size. The baby tutu's are 8 inches long and the toddler are 12 inches long. Flowers can be added for just $5.
Price:
Baby: 10 inches around (fits newborn- 6 months) - $10
Toddler: 18 inches around (9 months to 5 years) - $18


Candy cane tutu small and large


Wednesday, July 8, 2009

The Perfect Burp Cloths


These burp cloths combine the best of all burp cloths. They are absorbent, cute, offer a spot for your neck while still covering your shoulder and back for the messy spit-ups. Choose any 2 for just $9

Nap Mats


These mats are perfect for sleeping just about anywhere. We have taken ours to grandma and grandpa's, camping, and just for fun in the living room. These would also be ideal in a childcare facility whether you are the childcare provider or you take your child somewhere during nap time.

The mats are approximately 40 x 27 inches and the pillow is an additional 23 x 11 inches. The pillow is designed so it can be down or flipped up to make the mat longer to fit taller children. The top of the pad and pillow are made with flannel and include a sewn-in flannel blanket. The bottom is made with a heavy weight fabric to prevent tearing creating a more durable product. All pads roll up and have an easy carrying handle to allow toddlers to carry their own bed! $51

Tuesday, June 30, 2009

Baby Carrier Pouch Sling

Currently we offer single sided slings to allow for breathability. Double sided slings are available upon request for additional costs.
Features:
Machine washable in cold water. For best results use the delicate cycle.
Sturdy movable fabric
Padded leg area
currently available in Small, Medium, Large
Cost: $36


To determine fit measure from the outside of your R shoulder to the outer side of the left hip. Allow slack in the measuring tape to allow it to fall towards your belly button.

The proper fit will allow the sling to come right above your bellybutton or no more than 1 inch below when the baby is in the sling. 

We will soon have our own wearing instructions posted. Until then if you go to www.youtube.com and search for pouch sling instructions you will find great videos to help you learn various ways to carry your newborn to toddler!