Do you ever feel like kids parties are popularity contests, or are too overwhelming because you don't want to leave someone out? I have met some kids who at 8 have a busier social calendar then my whole family! With my crazy life I often ask myself what is important, what do I really need and why am I doing this? I am so grateful for the opportunities I had growing up to take dance lessons and to play softball (one season, I didn't like it), take piano lessons, and my favorite sewing lessons (thanks to Yvonne for being such a fun teacher!) I think that if a child shows interest and talent we should encourage them but for their benefit not ours.
On children's birthday parties- I once heard that a child can invite as many friends as they are old. So a 5 year old has 5 friends and a 10 year old has 10. I think that is wise advice and since I heard it I have tried to follow it. My question then becomes what about gifts? My children really don't need any more toys yet they love to open presents (really who doesn't) So how do we solve this predicament? I am open to suggestions.
My life lately seems to be filled with good days and not so good days. I have discovered that I do not have a house of democracy. Yes my children have choices but some things that is just the way it is. Example- with Ryan working most nights it is hard for me to be motivated to cook dinner, cereal is easier. So for awhile I would ask the girls what they wanted, big mistake. Now I tell them and then they get to choose whether they eat it or not. That is pretty much what I have done with work too. I use to feel bad about taking them to the childcare at the rec center. But now that is just what they have to do so I can get my workout in and so I can work.
Sunday, May 15, 2011
Thursday, April 14, 2011
Changes
So I want to change this blog to be more about my life as a true Mom on the go. Fill it with tips, how to's and more! To start I was assigned to speak about physical fitness tonight for church. As a result I was figuring out once again how many calories I need now that I am 33 and just had baby number 4. So I discovered that I really only need between 1200-1300 calories a day. This is first to loose weight and then to maintain it.
With that I have decided that if I only get 1200 calories they better be the tastiest calories ever. So I am on the search for the best tasting, low calorie, fulfilling recipes. As I find them I will post them here.
Wednesday, May 26, 2010
The Everything bag

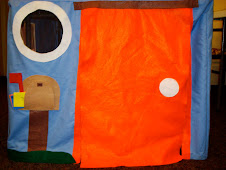
This bag is quickly becoming my best friend. I primarily use it to keep my kids busy on trips or at church. I pack it with treats, activities and anything else I think my kids will enjoy. I have also used it for a lunch bag to make sure my kids eat healthy. Each bag contains a different food group so I did, cheese, a fruit, crackers, lunch meat, a veggie and a treat.
Various uses:
- quiet bag
- organize kids collectibles
- bug catcher
- first aid kit
- lunch box
- toiletry bag
- art bag
- toy organizer for legos, polly pockets, barbies, transformers, cars etc
- craft organizer- paper scraps, ribbons, threads, yarn, and so much more
This bag can be used for just about anything. Whatever you need to organize I am sure it can help!
It comes in two sizes Quart sized and Gallon Sized. Each contains 6 individual bags. We have a variety of styles. E-mail us for our current selection.
Prices: Quart $8; Gallon $12
Wednesday, November 25, 2009
How to make a cute Countdown Calendar


Once a month my sisters and I try to get together and make some sort of craft or do something fun! This month we made advent calendars for Christmas! These turned out way cute and I hope you enjoy them.
First what you need:
2 4x4 blocks cut to be squared
1 2x4 cut 8 inches long block

paint
sandpaper (if you have an electric sander that is super handy)
2 sponge paint brushes
mod podge
12 scrapbook paper squares 3inches x 3 inches (you can have as much variety in this as you choose)
Coordinating paper or vinyl with the words you want on the block and the following numbers: 001122345678
Step 1: Sand down your blocks to get rid of all rough edges. I highly recommend wearing safety goggles while doing this step.
Step 2: Get your paint and your blocks out. Paint 1 to 2 coats of paint on your blocks. This all depends on how dark you want your color and how much of the wood you want to show. ALLOW PAINT TO DRY BETWEEN COATS
Step 3: While the paint is drying cut out your paper.
12- 3"x3" squares
2- 1"x 7 3/4" rectangles
2- 1"x 3" rectangles
Step 4: you can either purchase vinyl numbers and letters that are pre-cut. The numbers should be no larger than 3 inches we used 1 1/2 inch tall numbers. The letters should be no larger than 1 inch, we used 3/4inches. We used a cricut to cut out our numbers and letters. You could also do this on your computer or as a freehand.
Step 5: Modpodge your squares onto the blocks. You can either paint the modpodge onto the block or the paper. Then let the modpodge dry.

Tuesday, November 24, 2009
How to make a cute Countdown Calendar
Once a month my sisters and I try to get together and make some sort of craft or do something fun! This month we made advent calendars for Christmas! These turned out way cute and I hope you enjoy them.
First what you need:
2 4x4 blocks cut to be squared
1 2x4 cut 8 inches long block
paint
sandpaper (if you have an electric sander that is super handy)
2 sponge paint brushes
mod podge
12 scrapbook paper squares 3inches x 3 inches (you can have as much variety in this as you choose)
Also coordinating paper to go around bottom rectangle
Coordinating paper or vinyl with the words you want on the block and the following numbers: 001122345678
brown ink pad or coordinating color if you want to distress your blocks
Step 1: Sand down your blocks to get rid of all rough edges. I highly recommend wearing safety goggles while doing this step.
Step 2: Get your paint and your blocks out. Paint 1 to 2 coats of paint on your blocks. This all depends on how dark you want your color and how much of the wood you want to show. ALLOW PAINT TO DRY BETWEEN COATS
Step 3: While the paint is drying cut out your paper.
12- 3"x3" squares
2- 1"x 7 3/4" rectangles
2- 1"x 3" rectangles
Step 4: you can either purchase vinyl numbers and letters that are pre-cut. The numbers should be no larger than 3 inches we used 1 1/2 inch tall numbers. The letters should be no larger than 1 inch, we used 3/4inches. We used a cricut to cut out our numbers and letters. You could also do this on your computer or as a freehand.
Step 5: Modpodge your squares onto the blocks. You can either paint the modpodge onto the block or the paper. Then let the modpodge dry.
Step 6: After all of your paper squares are dry you can take an ink pad and gently brush it along the edges of the block to create a distressed look.Step 7: Mod podge your numbers and letters onto the blocks. On one block put the following numbers: 012345
On the second block: 012678
Notes: the 6 doubles as your 9 so be careful to choose a paper that will look good right side up and up side down ie. stripes, solid, etc.
Place modpodge on the back of the number and then all over the face of the block. By putting modpodge all over the face of the block it creates a seal.
After this let it dry and you are done!
Let me know if you have questions.


Something New
We are going to be adding a new section to our blog. We will be adding a how to. I know how much I enjoy learning how to make something for free! So as often as we can we will add a how to on a recipe, a craft or anything we think is fun to do!
Monday, November 16, 2009
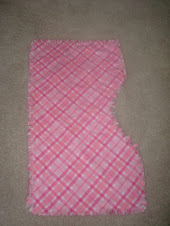
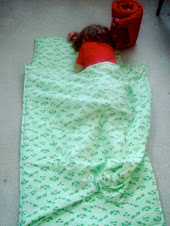
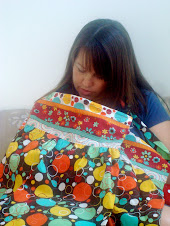
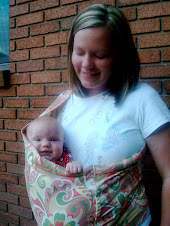
Reversible Slings

I decided to try this for a friend of mine who is purchasing 2 for her sisters-in-law. I think they turned out super cute! They can be yours for just $40. They are washable in cold water, tumble dry low. It is like having 2 slings in one!

Subscribe to:
Posts (Atom)